Filmmaking Basics/3D Storyboard/Building a simple movie set inside FrameForge

Messages for students
This school is:
Narrative film production - Wikiversity Film School
This course is:
The basics of narrative filmmaking
This lesson is:
Lesson: 3D Storyboarding
Pages of this Lesson:
Storyboarding using 3D software
Introduction to FrameForge 3D Studio free demo version
Getting started with FrameForge 3D Studio
Page 1 - Getting started storyboarding "Seduced by the Dark Side!"
Page 2 - A simple example
Page 3 - Building a movie set inside FrameForge
Page 4 - Creating depth of field inside FrameForge free demo version
Before and After: corrections by instructor
The corrections for Sir Mok
All the completed storyboards by students
The amazing storyboard from Gare Cline


Optional


Getting started with FrameForge 3D Studio


Creating a simple movie set

To do storyboarding with FrameForge 3D Studio, you do not need a movie set.
However, a movie set looks nice and helps you get orientated.
You can download the movie set file at from the FrameForge community forum.
Or you can create your own. Here are optional instructions for people who want to create their own a movie set.


1. Create a wall in FrameForge 3D Studio


Room Builder

Using Room Builder, create a single wall which is 10 feet tall (3 meters) and 40 feet long (12 meters).
Drawing this exactly is difficult so use the numerical boxes to set the sizes.
Once you do this, you are finished. Press the Build Rooms button.
Click on the picture to see it full size.


2. Select the picture and frame in Artwork


Select the picture with frame

Once you are in the main menu, select Artwork.
In Artwork, select the picture which has a frame.


3. The picture appears on the ground.


Drag the picture to the movie set

Simply grab the picture and drag it to the movie set next to the wall.
The picture will sit on the ground so you will have to move it into place using the controls on the right when the picture is selected.


4


Elevate and resize the picture frame

While the picture is selected, use the controls on the left side of the main window of FrameForge 3D Studio to raise (elevate) the picture to the proper height.
Using the control for scale, increase the size of the picture frame slightly so it looks about the correct size for a movie poster.
If you do not have the picture frame selected, it can be difficult to select. In that case, simply go to the menu for selecting items by name. Click in the check box for the picture. Highlighting alone does not work.


5


Adjust the picture by eye

You can see what the picture looks like against the wall. Therefore, it is easy to adjust the size until it looks right.
6


Replace the picture

The picture frame consists of two parts. The frame and the poster. You want to change the poster, not the frame.
Select the picture and then double click on the picture. You will get the "Green Room" window. There is no menu item for the "Green Room" which is annoying.

Be sure that you select the option "poster" and not "frame" which is the default.

7


Storing the picture in the correct folder

When you want to modify textures in FrameForge 3D Studio, the new textures need to be in the correct folder.
Start by going to the folder for FrameForge 3D Studio and look for the folder called "Support".
8


Locate the Texture Folder

Inside the support folder is the texture folder.
Rather than put the texture in the user folder (which I have not been able to get to work), put the picture in the decal folder. This is as good a place as any.
9


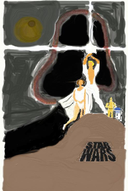
The Star Wars Poster

If you do not want to create your own Star Wars poster, you can use any of the completed storyboard frames.
Click on the picture to see the original.
Save the image to the decal folder as a PNG file.


10


The finished Poster in Frame

When you have added the poster into the frame, it should look like this.
11


Create more posters

With the frame selected, create more posters just by duplicating them.
In the floor plan view (double click on the floor plan to activate the floor plan), drag the new frames to the correct locations.
You will probably want three or four posters on the wall.


12

Adjust the second poster

Once you have duplicated the poster, you need to move it to the correct positon.
13

Drag the posters along the wall

It is probably easier to drag the poster while looking at the floor plan.
14


All four posters

When you have four posters, they should look like this.


15


Change the color of the wall

With the wall selected, change its color.
16


Change the color of the floor

Go to the set menu and change the floor color
17


The finished movie set

All done.
18


Optional

You can change the floor color to the texture of fine grain granite.
You can add a sidewalk by using a building block which is sized at 6 inches by 2400 inches by 96 inches which has the texture of concrete.
You can make the wall any texture you wish.
You can use any poster you wish.
You need to practice with FrameForge 3D Studio

The next page

Next you need to look at the instructions for creating depth of field inside FrameForge.

Contact your instructor

Your instructor for this filmmaking class is Robert Elliott. You can email me by clicking here.